Customizing the extraction
When extracting sequences, you should use different settings for different data-types. PhyloSuite has five predefined data-types, Mitogenome, general, cox1, 16S and 18S, but you can easily add your own data-type extraction settings, suited to your data.
Here I will demonstrate the process of making the extraction settings for the mitochondrial genome data-type.
1. GenBank file format
The GenBank file format (Feature section) is shown below (for detailed GenBank format please visit https://www.ncbi.nlm.nih.gov/Sitemap/samplerecord.html):
FEATURES             Location/Qualifiers
    source[Feature] 1..5028
                    /organism[Qualifier]  ="Saccharomyces cerevisiae[Value or Name]"
                    /db_xref[Qualifier]   ="taxon:4932[Value or Name]"
                    /chromosome[Qualifier]="IX[Value or Name]"
                    /map[Qualifier]       ="9[Value or Name]"
    CDS[Feature]    1..206
                    /product[Qualifier]   ="TCP1-beta[Value or Name]"
Three terms, Feature, Qualifier and Name (see above), are important for us to extract a sequence. After importing your sequences into PhyloSuite (see this example for how to select and download mitogenomes), you can open the sequence to check which features and qualifiers it contains.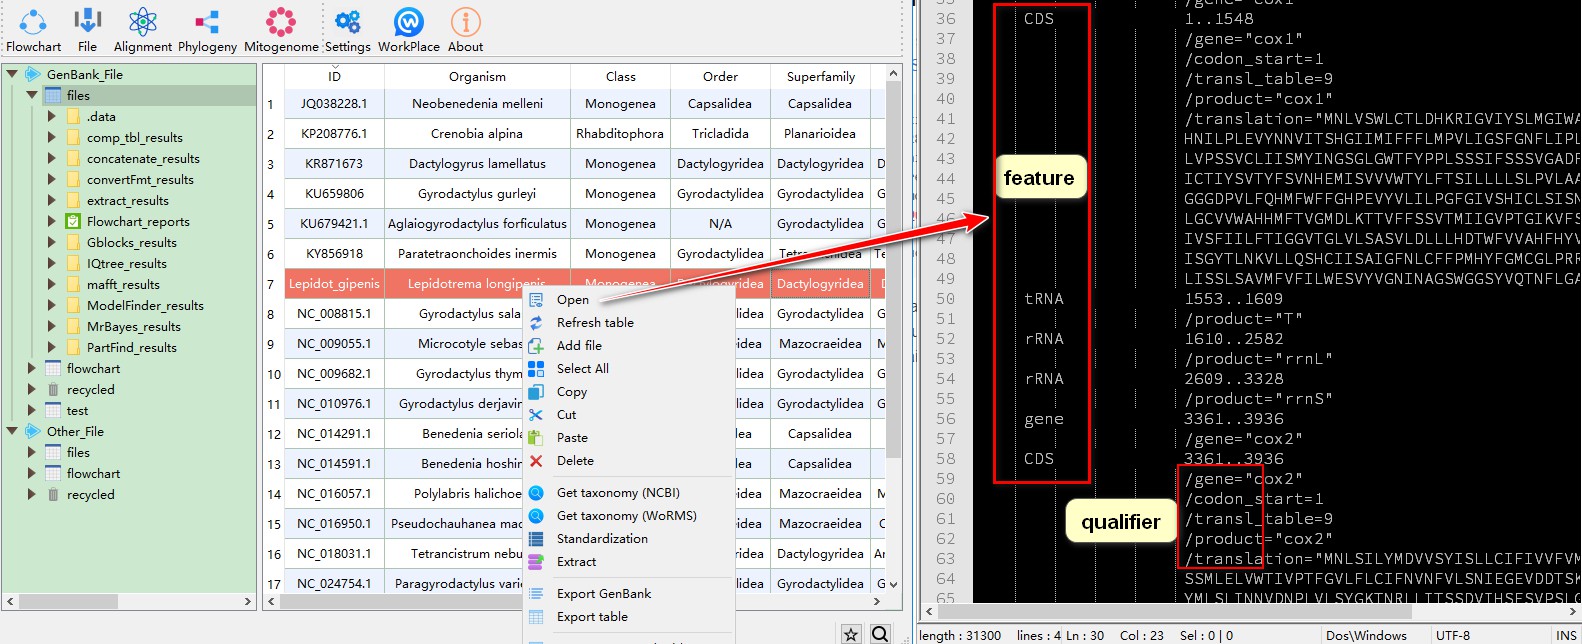
2. General extraction
See this brief demo for how to operate the extraction function.
By default, PhyloSuite provides settings for six data-types (loci): Mitogenome, chloroplast genome, general, cox1, 16S and 18S. You can inspect them via Settings-->GenBank File Extracting. When you are not sure which data-type setting to use, you can choose general.
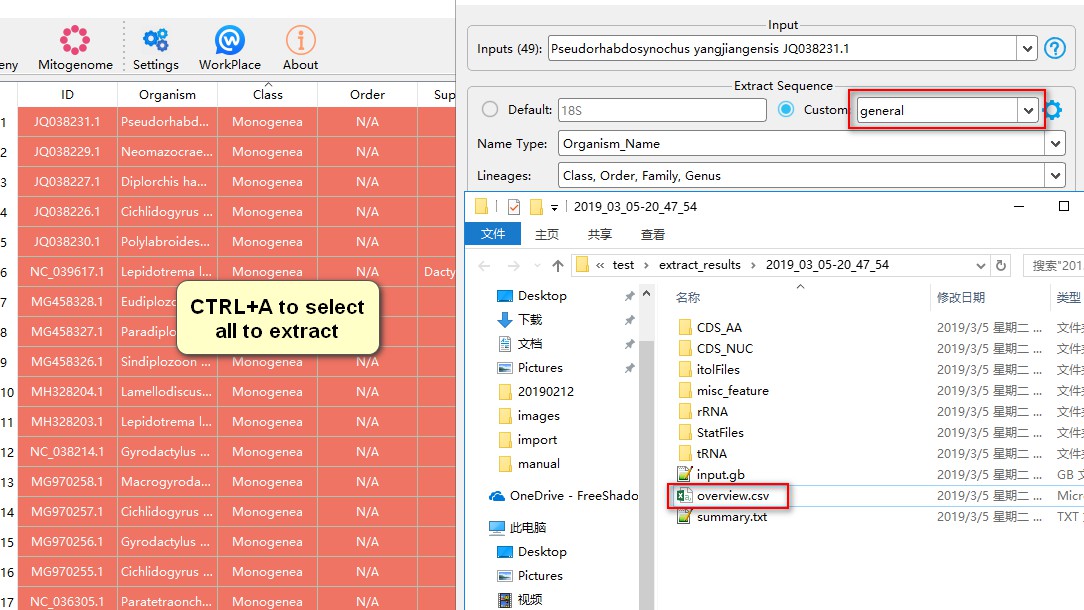
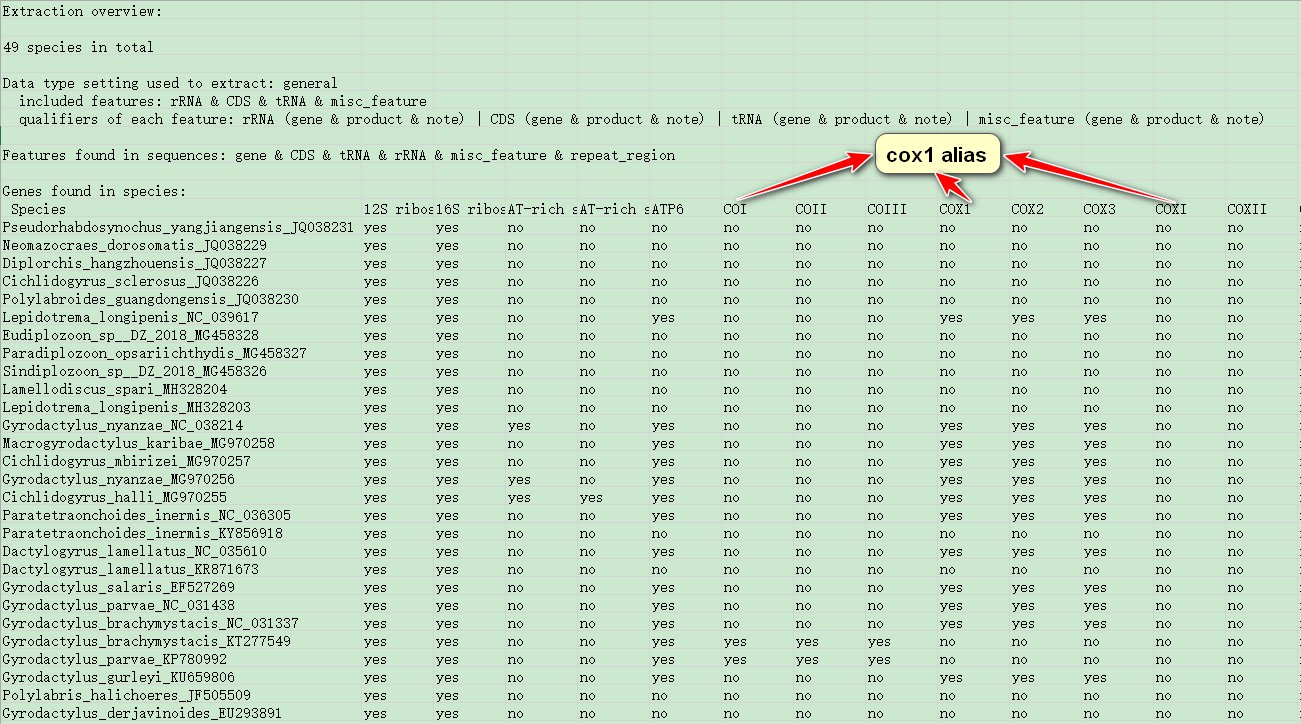
After the extraction, you can open overview.csv file to see the summary of this extraction.
From this file, you can see the features that these data contain, and settings for the general data-type. In my example, you can see that many genes are synonymous (for example, COI, COX1 and COXI are synonymous); they can be unified in the following step.
3. Customize extraction
For detailed description of the extraction settings, please refer here.
Based on the overview, now we can adjust the settings to suit our sequences.
- Click
gearbutton to open the settings; - Click
Current versionbutton, then selectAdd new version; you can name itmtDNAin the popup window.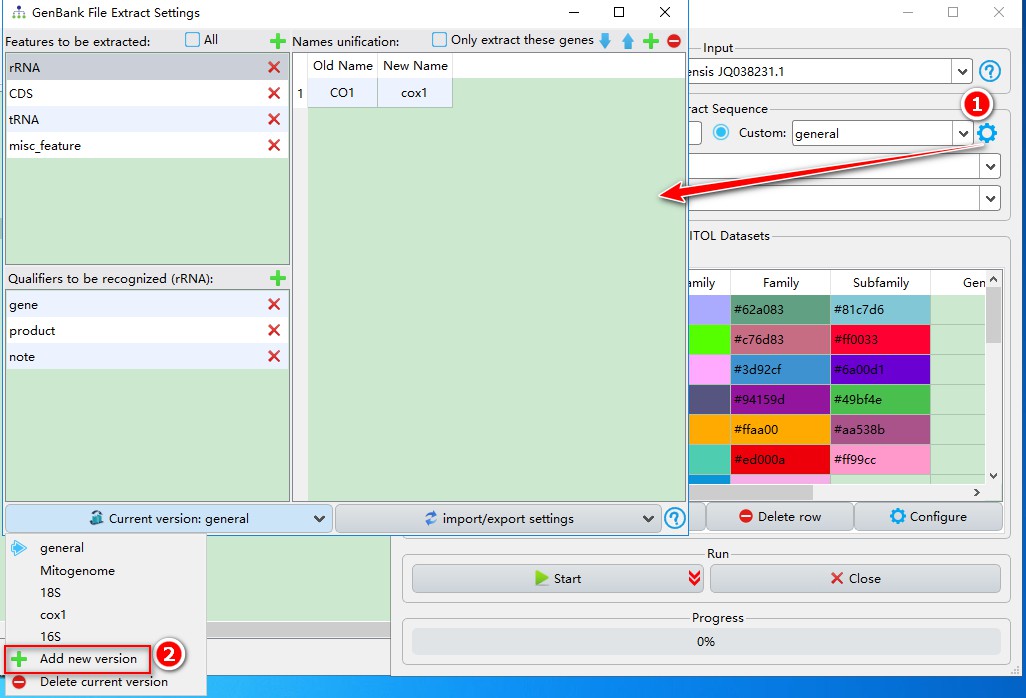
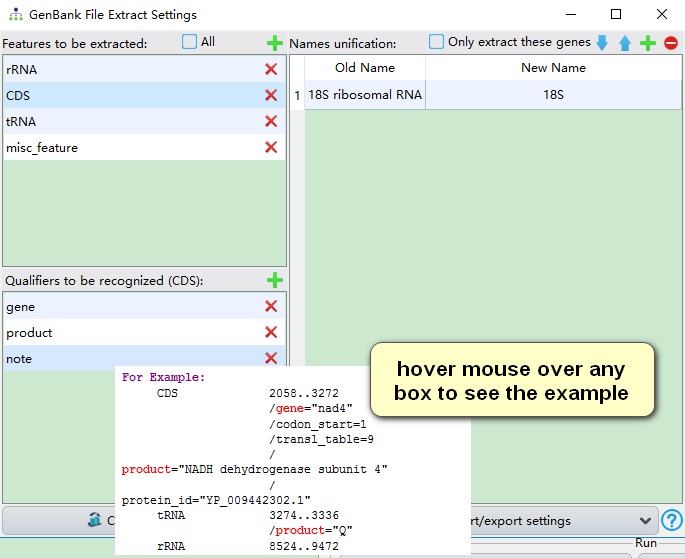
You will see that only rRNA feature is predefined, so we can add more features according to the overview.csv file above. Click the add button, and then enter the feature name that you intend to include into your extraction. You can refer to “Features found in sequences” section in the overview file to decide which features to include (note that feature names are case-sensitive). Here, I added CDS, tRNA and misc_feature. Every time we add a feature, its default qualifiers are gene, product and note. Generally, they are sufficient to cover most cases, but you can add other qualifiers via the corresponding add button.
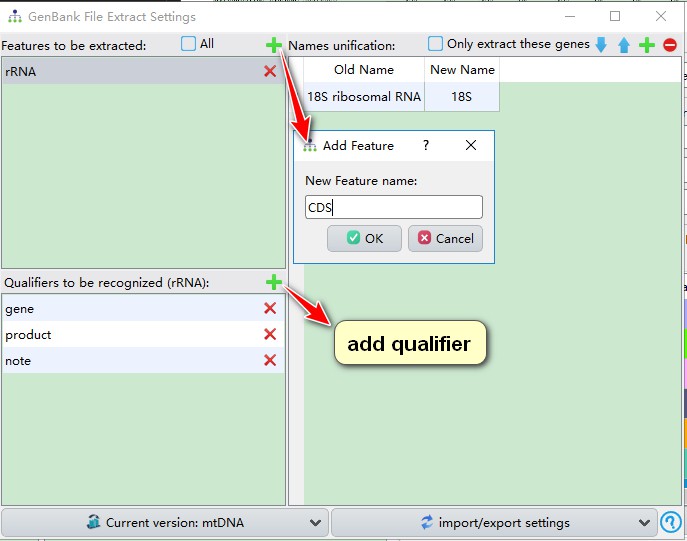
Qualifiers are used to recognize gene names: PhyloSuite will search the value/name of qualifiers one by one. In the example below (see screenshot), PhyloSuite will first search the value/name of gene for CDS, if there is no gene qualifier, then it searches the value/name of product, and finally the value/name of note. If none of the specified qualifiers are found for the feature, it will be recorded in the summary.csv file.
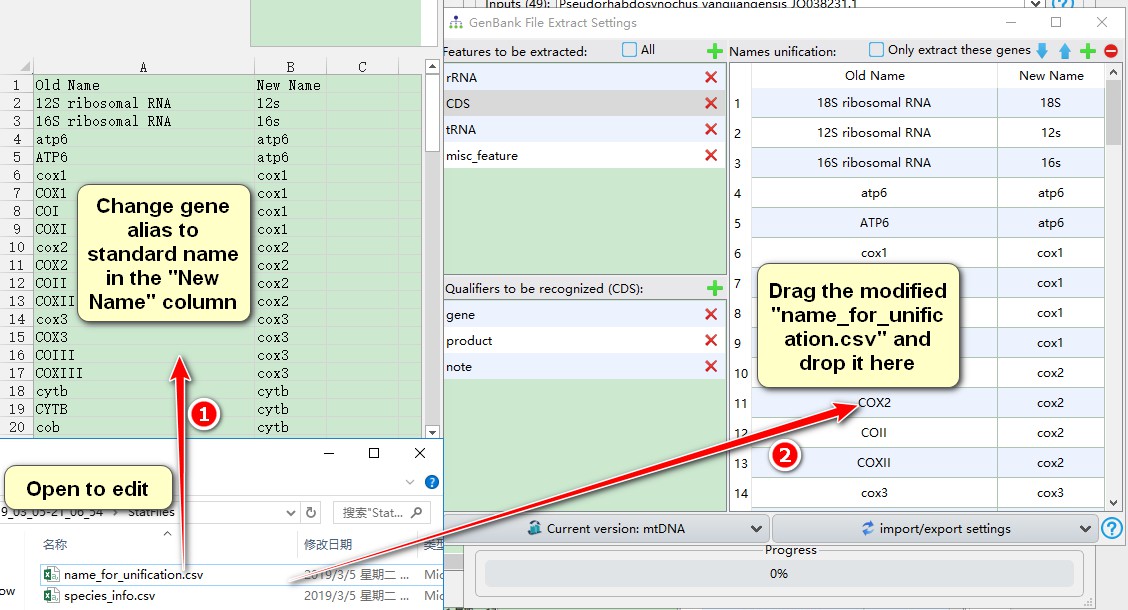
Finally, we need to unify synonymous gene names. In the extracted results folder (the one from the section 2 of this demo), go to StatFiles folder and open the name_for_unification.csv file.
- Modify gene aliases to the chosen standard name in the “New Name” column;
- Drag the modified “name_for_unification.csv” file and drop it into the area specified below (see screenshot).
Closing the settings window will save your parameters automatically. See also http://phylosuite.jushengwu.com/dongzhang0725.github.io/PhyloSuite-demo/single-gene-phylogeny/#2-Sequence-extraction.
4. Extracting with customized settings
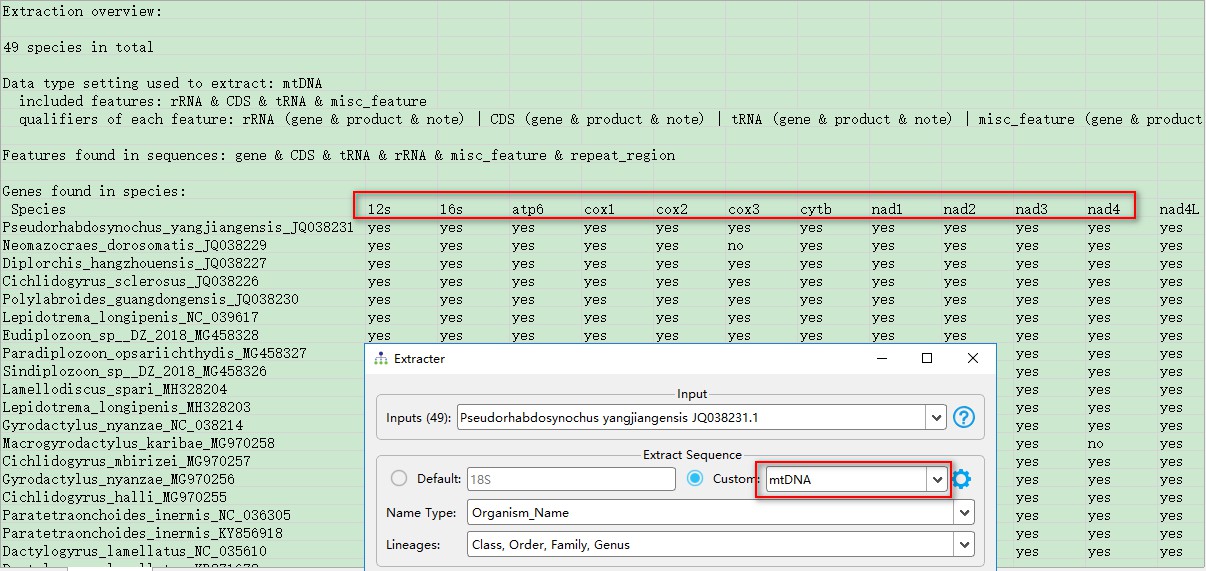
Now we can use the customized setting to extract the sequences anew. The multiple gene name aliases should be unified in the extracted file (see screenshot).
5. Recommended reading
Other demo tutorials can be seen here.